I've followed a few craft blogs before, but not many. And during my little "hiatus" I discovered Pinterest. Pinterest is one of those things that if you never knew about it, you would go about your daily life, never realizing that you are missing out on a world of inspiration. I have to admit, I'm on Pinterest every day, some times multiple times a day, and I love sifting through all the crafts on the DIY & Crafts board. I've gotten so many wonderful ideas from the Food & Drink board, too! So you can look forward to a few tutorials from crafts I've seen on Pinterest!

This particular craft really caught my eye just as Bonnie and I were leaving for JoAnn's, and I decided I would try it, if I had the time. Who would have thought it would be one of the best crafts I've ever done? And seriously? One of the easiest! The original project was Song Lyric Wall Art / D.I.Y Project. Her's turned out so cute, I just had to try it myself! She did a tutorial on it, but instead of using liquid white paint, I used spray paint, and it turned out wonderful!
Supplies Needed:
- Painting
- Letter Stickers (I got mine from the scrapbooking section)
- White (or another color) Spray Paint
- Patience
First, take a painting (I picked mine up at JoAnn's, on clearance, for under $5).

Next, cut out the letters and place (without sticking) on the painting to get the exact positioning right!
 |
| We ran out of h's, so we had to improvise! Doesn't look too bad, does it? |
Now, begin sticking the letters straight onto the painting! But, make sure you don't press them down too hard, you're going to be peeling them off in a little bit! And, as you can see, we used a straight edge to get perfect lines throughout.

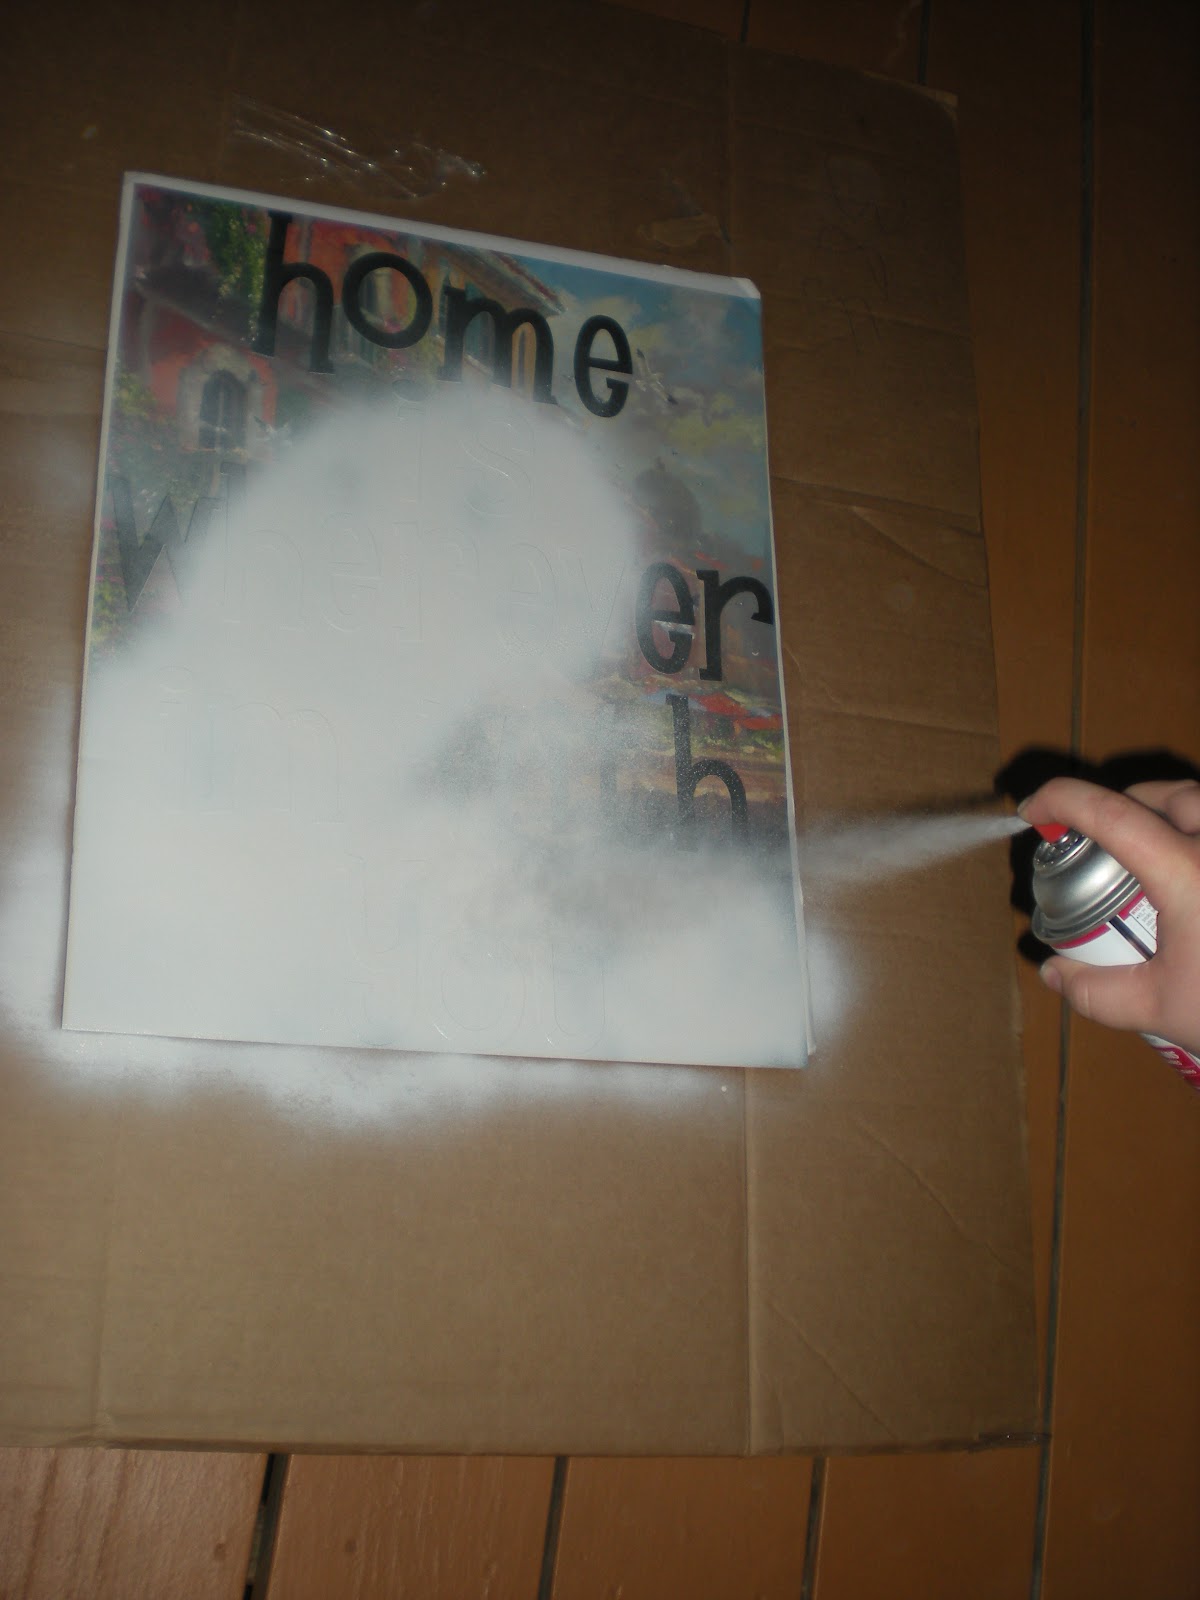
Get ready to spray paint! Make sure all the stickers are exactly where you want them to be.

And then take the painting out to a well-ventilated area and begin spraying! I sprayed in circles, mostly, then came back to the areas afterwards that needed a little more lovin'.
After you're finishing spraying, let the paint dry, but not completely. We waited about ten minutes, and used the time to catch up with each other! Then, carefully begin peeling the letters off. Having long nails really helps with this part!


No comments:
Post a Comment