I’m sure it’s not very often that you sit there and think “Wow, I could really paint a slab of wood right now. I mean, really, if I only had carving tools, wood, and paint…” Unfortunately, that is EXACTLY how I think; therefore, I went out and bought exactly what I needed. While I do generally encourage people to try new things, this project will probably cost about $30, so think about it first. If you don’t want to carve out what you’re painting first, then it’ll probably only cost half of that.
What I Used:
Beginner’s carving tools (because really the last thing I need is hard-to-use-and-sharp objects)
Slab of wood (I like the one I bought because it still had a bark frame. Using one of the pre-cute and sanded pieces of wood will knock the cost down even more, though.)
Paint (I ended up using only yellow and brown)
Paint Brushes
Pencil
Paper
Slab of wood (I like the one I bought because it still had a bark frame. Using one of the pre-cute and sanded pieces of wood will knock the cost down even more, though.)
Paint (I ended up using only yellow and brown)
Paint Brushes
Pencil
Paper
Step 1:
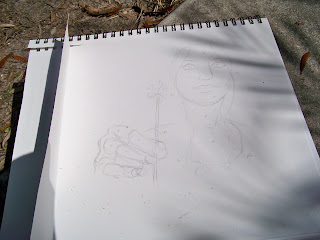
Sketch out, on the paper, basically what you think you want to paint. This is important, because pencil doesn’t erase easily off wood.
Step 2:
Now, pressing lightly with the pencil, sketch your drawing onto the wood.
Step 3:
Using the thin, diagonal-straight blade from the carving kit, trace your lines into the wood. Don’t just cute the very edge, you should be leaving a line that won’t wear down into the wood quickly. Always cut AWAY from you, too. My art teacher and I used to head-butt about that because I carved better if I went towards my hand. That ended after I bled all over my work THREE different times. (I’m a slow learner. Learn from my mistakes though: DO NOT CARVE TOWARDS YOUR OWN FLESH!)
Tip: Use multiple lines for hair or leaves, or anything like that. It’ll had a little more detail, but it’ll still keep a sort of “abstract” look.
Step 4:
Hold the wood flat in front of your face, and blow the shavings off. There probably won’t be too many, but you don’t want them getting caught under the paint. Avoid doing this in the direction of someone's face. It's painful.
Step 5:
Using the paint, begin shading. For the regular shading I used a yellow-brown mix. I would paint a line or blot and then drag my finger throw it to smear it. I also did this using a dry brush, which gives it a spotted, jerked look. I used regular brown for the darkest areas, and yellow to accent small parts. I painted the dark brown along the outer edge and smeared it in, too, so the shaded part would really stand out. The thing is, I didn’t cover the entire wood with paint. See if you can leave some of the natural color peaking out! It can be the lightest area, or if you would rather not paint the outside part, it can be the background!
Detail: I haven’t done this yet, because I’m not home and I don’t have all my paint. What you probably can’t tell right now is that the girl in mine is holding a dandelion. Once I have my white paint, I’m going to trace the fluffy part with it to make it really stand out. I’ll update this blog when I have the final product!
Enjoy your wood project :P
-Bonnie


No comments:
Post a Comment